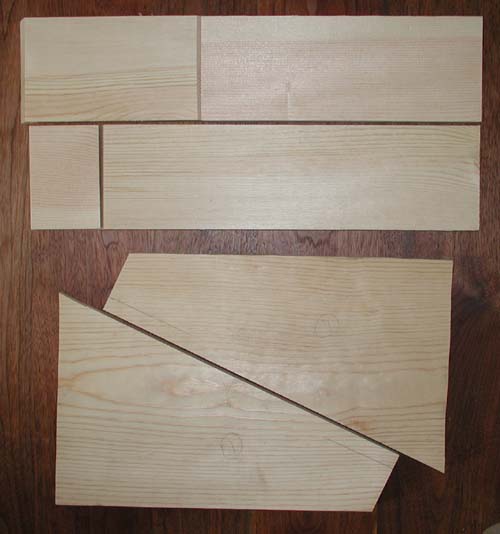
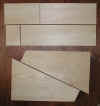
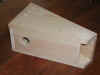
 All the wood parts are shown on the
left except for the outer roof. Click on
any of these pictures to see a larger version. The four pieces shown on
the top portion of this picture are
the back, floor, inner roof and front. They are all of the same width, and
you can decide to make them as wide as you like. In my case I decided to
make them 4.5" wide. On the bottom of this picture are the
two sides which give
the Peterson Box its unique shape. They are arranged so they can be cut from a single piece of
1x12 stock 18" long.
All the wood parts are shown on the
left except for the outer roof. Click on
any of these pictures to see a larger version. The four pieces shown on
the top portion of this picture are
the back, floor, inner roof and front. They are all of the same width, and
you can decide to make them as wide as you like. In my case I decided to
make them 4.5" wide. On the bottom of this picture are the
two sides which give
the Peterson Box its unique shape. They are arranged so they can be cut from a single piece of
1x12 stock 18" long.
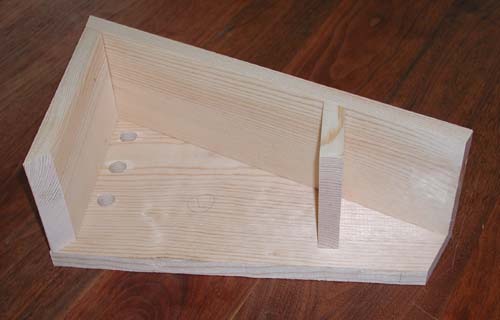
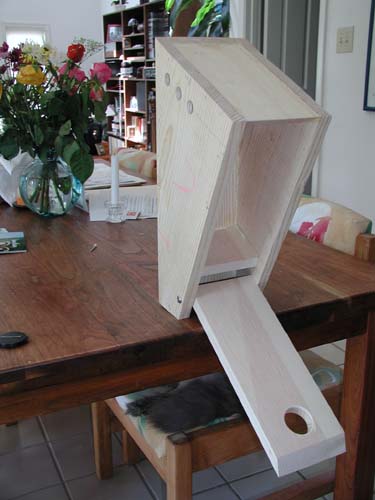
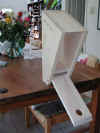
 The
first step of the assembly is to put together one side, the inner roof and the
back. These can be glued (waterproof glue) and either nailed or screwed
together. Next, the floor is attached as shown. Pre-drilling holes for screws and/or nails
will help make the assembly easier and more fun.
The
first step of the assembly is to put together one side, the inner roof and the
back. These can be glued (waterproof glue) and either nailed or screwed
together. Next, the floor is attached as shown. Pre-drilling holes for screws and/or nails
will help make the assembly easier and more fun.
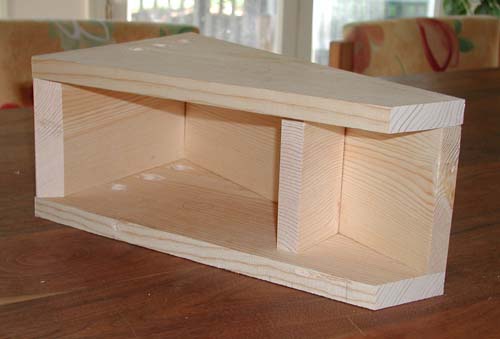
 The
second side is attached in the same manner as shown.
The
second side is attached in the same manner as shown.
 And
here on the left is the completed box with the front in place, but the outer roof is
still missing.
And
here on the left is the completed box with the front in place, but the outer roof is
still missing.
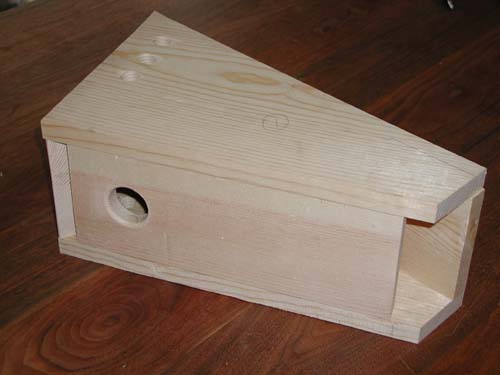
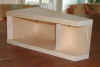
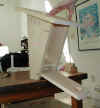
 The
completed box is shown with the door open. Note the outer roof is not yet
attached.
The
completed box is shown with the door open. Note the outer roof is not yet
attached.
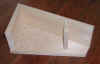
 Finally,
the box is completed by attaching the outer roof. This roof overhangs
3" in the front, 2" in the back and about 2" on each side.
Note the screw to hold the door in place when it is closed. Now you can go to
the Construction Plans (which can be printed,)
to make the box in your shop. Before attaching the outer roof, run a
bead of "Silicone Seal" around the top perimeter of the box (exclude the front
end.) This will help to keep the box dry when it rains.
Finally,
the box is completed by attaching the outer roof. This roof overhangs
3" in the front, 2" in the back and about 2" on each side.
Note the screw to hold the door in place when it is closed. Now you can go to
the Construction Plans (which can be printed,)
to make the box in your shop. Before attaching the outer roof, run a
bead of "Silicone Seal" around the top perimeter of the box (exclude the front
end.) This will help to keep the box dry when it rains.