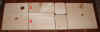
 The
photo on the left shows the actual pieces of wood before cutting the side
vents. They are arranged as they were cut from the one piece of
wood. Click on the pictures for a better view. Note that cut
"A" is made with the miter angle set to zero, the bevel angle set to 5
degrees. Cut "B" is made with the miter angle set to 5 degrees
and the bevel angle set to zero. The floor corners are cut at 45 degree miter
and 20 degree bevel. If you have questions about this design, please let
me know.
The
photo on the left shows the actual pieces of wood before cutting the side
vents. They are arranged as they were cut from the one piece of
wood. Click on the pictures for a better view. Note that cut
"A" is made with the miter angle set to zero, the bevel angle set to 5
degrees. Cut "B" is made with the miter angle set to 5 degrees
and the bevel angle set to zero. The floor corners are cut at 45 degree miter
and 20 degree bevel. If you have questions about this design, please let
me know.
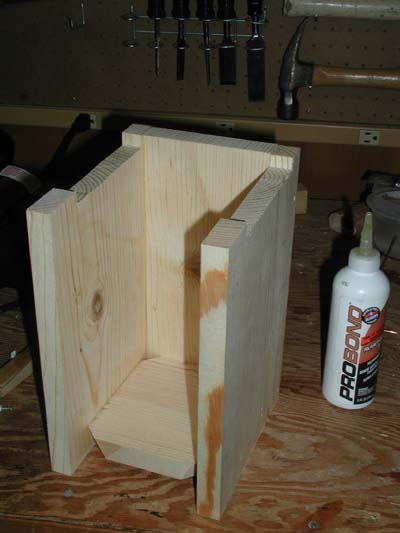
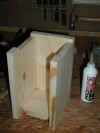 The
first step is to glue (waterproof glue, bottle shown) and nail or screw the two
sides to the back and bottom as shown. Make sure you have made the
1/4" mounting hole in the back and the two little holes (to use a
1/4"x2" carriage bolt and wire to
hang the box on a metal post.) Also, pre-drill for the two pivot screws and the
closing screw. Use either 1-5/8" decking screws or 2-1/2" 15
gauge nails (I use a pneumatic nailer.)
The
first step is to glue (waterproof glue, bottle shown) and nail or screw the two
sides to the back and bottom as shown. Make sure you have made the
1/4" mounting hole in the back and the two little holes (to use a
1/4"x2" carriage bolt and wire to
hang the box on a metal post.) Also, pre-drill for the two pivot screws and the
closing screw. Use either 1-5/8" decking screws or 2-1/2" 15
gauge nails (I use a pneumatic nailer.)
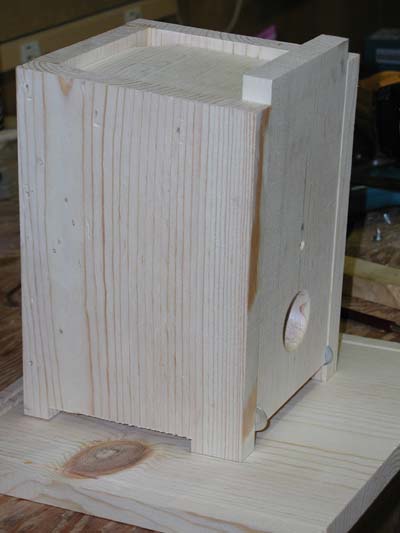
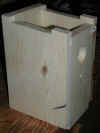 Next,
loosely fit the front in place. Use two washers as shown to make sure
there is room for the door to be open freely when the box is finished. It
may be necessary to take a shaving off the door so it will fit easily in the
opening.
Next,
loosely fit the front in place. Use two washers as shown to make sure
there is room for the door to be open freely when the box is finished. It
may be necessary to take a shaving off the door so it will fit easily in the
opening.
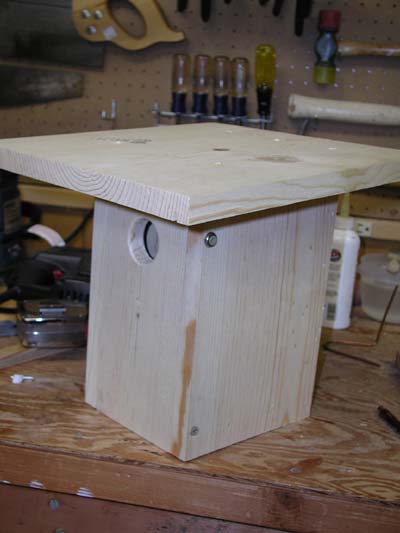
 Now
invert the box on the roof as you see on the left. Center the box properly
from left to right. Allow more overhang on the front (3.25" in the
front and 1.5" on back.) Use a sharp pencil and mark where the box
meets the roof. Drill holes (three in the back and two in the front) for
screws. Use glue and 5 screws to fasten the roof onto the box.
Now
invert the box on the roof as you see on the left. Center the box properly
from left to right. Allow more overhang on the front (3.25" in the
front and 1.5" on back.) Use a sharp pencil and mark where the box
meets the roof. Drill holes (three in the back and two in the front) for
screws. Use glue and 5 screws to fasten the roof onto the box.
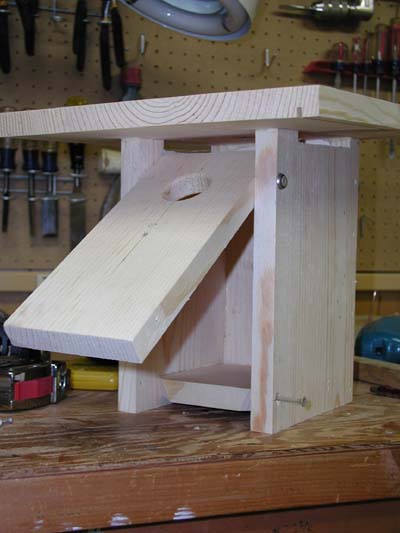
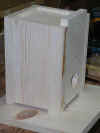
 Next
remove the spacer washers and put the hinge screws (use a finishing washer as
shown.) You can also see the closing screw near the bottom.
Next
remove the spacer washers and put the hinge screws (use a finishing washer as
shown.) You can also see the closing screw near the bottom.
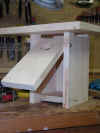 Here
is the completed box with the screw loosened and the door open. You
can see detailed plans by going to the Construction
Plans section.
Here
is the completed box with the screw loosened and the door open. You
can see detailed plans by going to the Construction
Plans section.