 The
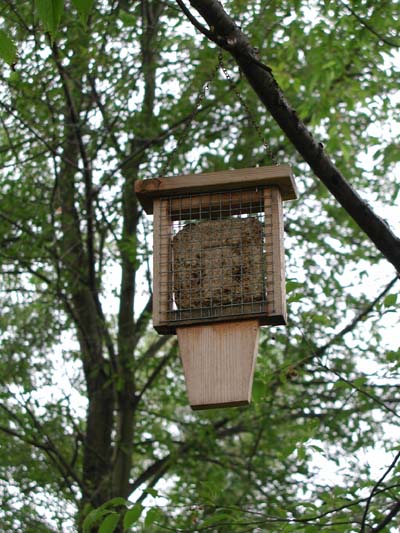
first woodpecker feeder I made I copied from a bird magazine, click on the
picture to the left to see it. Right away, all other birds (besides
woodpeckers) started to eat the suet cake inside it. So, I designed and
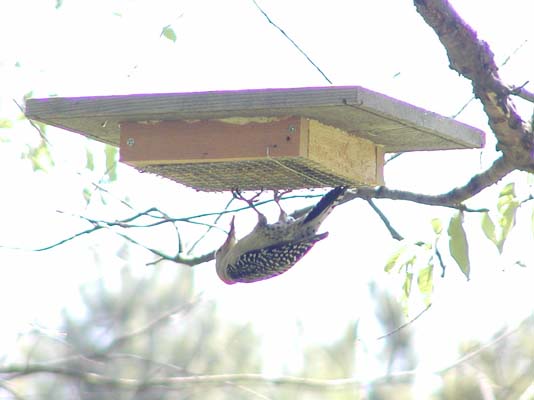
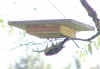
made my own. One of my first designs is the one shown to the right.
Alas, in a short time all sorts of animals were eating from it. Blue jays,
starlings, crows, even squirrels were enjoying a free lunch on this
feeder! Here, in the picture to the right you see red-bellied woodpecker enjoying a
meal. It took me several years and more than a dozen different
designs to come up with a feeder that was exclusively used by woodpeckers, at
least 95% of the time! Here are the plans to make the best woodpecker
feeder I could design.
The
first woodpecker feeder I made I copied from a bird magazine, click on the
picture to the left to see it. Right away, all other birds (besides
woodpeckers) started to eat the suet cake inside it. So, I designed and
made my own. One of my first designs is the one shown to the right.
Alas, in a short time all sorts of animals were eating from it. Blue jays,
starlings, crows, even squirrels were enjoying a free lunch on this
feeder! Here, in the picture to the right you see red-bellied woodpecker enjoying a
meal. It took me several years and more than a dozen different
designs to come up with a feeder that was exclusively used by woodpeckers, at
least 95% of the time! Here are the plans to make the best woodpecker
feeder I could design.
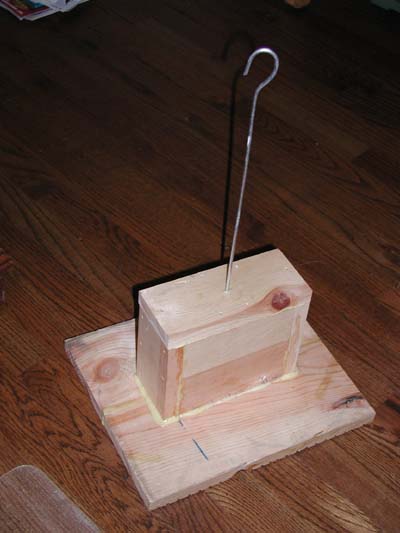
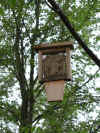
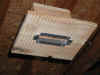 First,
take a look at the picture of the finished product. Click on the picture
to the left. This feeder was hung in the basement because it was raining on the
day I took this picture. First note the big platform is at the bottom of
the feeder. The suet cake (measuring about 4.5 x 4.5 x 1 inch) goes inside
the hole and is above the platform inside a wood box. The opening is lined
with angle aluminum, making it squirrel proof. The suet is held in place
by several nails easily removed in order to put a new suet cake when the old one
is used up. Next, the details.
First,
take a look at the picture of the finished product. Click on the picture
to the left. This feeder was hung in the basement because it was raining on the
day I took this picture. First note the big platform is at the bottom of
the feeder. The suet cake (measuring about 4.5 x 4.5 x 1 inch) goes inside
the hole and is above the platform inside a wood box. The opening is lined
with angle aluminum, making it squirrel proof. The suet is held in place
by several nails easily removed in order to put a new suet cake when the old one
is used up. Next, the details.
Materials Needed: ♦Wood: 3/4" x
5.5", 42" plus a small piece for the roof, 3/4" x 3" x
6.5". ♦6 Sheet
metal crews: #8, 1". ♦Angle aluminum: 3/4
x 3/4 x 1/16, 13" long. ♦Water proof
glue. ♦Fasteners: If using a nailer, use 15
gauge 2.5" nails, if using screws, use 2" decking screws. ♦7
galvanized nails, 3" to 3.5" long. ♦15"
fence wire (about 9/64" in diameter) to hang the feeder.
 Construction
Details: Cut the four sides of the wood box as shown to the
left. Next cut a piece of wood for the roof (3/4" x 3" x
6.5") and drill a hole in its middle for hanging the feeder. This
hole should be the size of the hanging wire. Clamp the two bigger sides
and drill 7 holes centered 1/4" above the lower edge. These holes
should allow the galvanized nails to go in easily. They will hold the suet
up inside the box. Glue the four sides (making sure the holes are aligned
properly.) See the picture below.
Construction
Details: Cut the four sides of the wood box as shown to the
left. Next cut a piece of wood for the roof (3/4" x 3" x
6.5") and drill a hole in its middle for hanging the feeder. This
hole should be the size of the hanging wire. Clamp the two bigger sides
and drill 7 holes centered 1/4" above the lower edge. These holes
should allow the galvanized nails to go in easily. They will hold the suet
up inside the box. Glue the four sides (making sure the holes are aligned
properly.) See the picture below.
 The
view on the left shows the assembled box with the suet inside. Note there
are two views, one from the side, another from the bottom. You can see the
seven holes for the nails to hold the suet up. Also the roof piece is
glued on the top.
The
view on the left shows the assembled box with the suet inside. Note there
are two views, one from the side, another from the bottom. You can see the
seven holes for the nails to hold the suet up. Also the roof piece is
glued on the top.
Next
cut two pieces of wood, 5.5" x 11". In each cut a notch
3/4" x 5" as shown (when placed together, the hole will be 1.5" x
5".) Before gluing the two pieces, make grooves about 1/2"
apart, three such grooves are shown in the figure to the right. Make
parallel grooves to cover the entire wood surface. Glue and
clamp the two pieces as shown. When the glue is dry, glue this base to the
box as shown in the figure below, right.
 Next
cut the angle aluminum in half. Then cut one flange and bend the other
flange at this point as shown in the figure below. Make two such
pieces. Bending them in a vise is good idea to make the bend sharp and
square. Note that the two pieces are essentially the same and measured to
fit in the rectangular hole in the wood base.
Next
cut the angle aluminum in half. Then cut one flange and bend the other
flange at this point as shown in the figure below. Make two such
pieces. Bending them in a vise is good idea to make the bend sharp and
square. Note that the two pieces are essentially the same and measured to
fit in the rectangular hole in the wood base.
 Drill
3 holes in each piece to take the #8 sheet metal screws (3/16" holes will
do well.) Attach the two pieces in the rectangular opening, some filing of
these aluminum pieces may be necessary to make them fit properly. As
usual, before attaching the screws make pilot holes (9/64") in the
wood. Click on the figure below (left) for proper placement of these screws and
the aluminum angles.
Drill
3 holes in each piece to take the #8 sheet metal screws (3/16" holes will
do well.) Attach the two pieces in the rectangular opening, some filing of
these aluminum pieces may be necessary to make them fit properly. As
usual, before attaching the screws make pilot holes (9/64") in the
wood. Click on the figure below (left) for proper placement of these screws and
the aluminum angles.

 Finally
make the wire to hang the feeder as shown in the figure below. First make
the small loop, then insert the other end into the hole from the inside of the
box. Now make the hook for hanging the feeder. This is seen in the
picture on the right.
Finally
make the wire to hang the feeder as shown in the figure below. First make
the small loop, then insert the other end into the hole from the inside of the
box. Now make the hook for hanging the feeder. This is seen in the
picture on the right.

This is all there is to it! I buy the suet ready made in boxes with a
dozen in each box. They come in many flavors. They are about
4.5" x 4.5" x 1" in size. Slide the nails out using a pair
of pliers, insert the suet, slide the nails back to hold the suet in place, then
hang the feeder in a place the woodpeckers like to visit. I usually bend a
wire over a low branch then make a hook in its lower end. Now I can hang
the feeder on this wire by reaching up without using any ladders or step-stools.