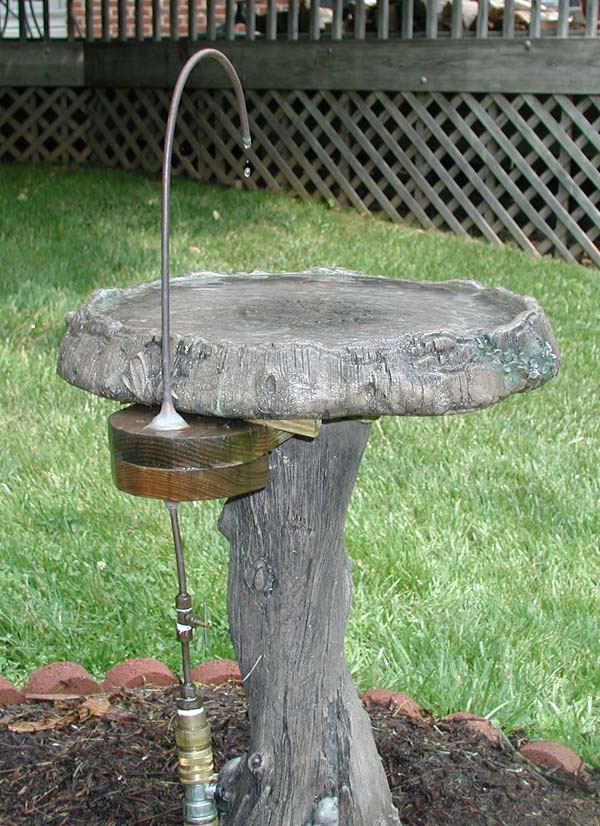
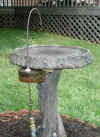
 Note the copper pipe (1/4") bent (and passing through the wood base) is anchored using silicone rubber. Outside the pedestal, the wood is double thickness. The assembly is placed between the pedestal and the bath. The wood base is all the way to the other side of the bath. Note the in-line shut off valve to adjust the rate of the dripper. Below that are the "adapters" to fit it to the
garden hose. I have a "quick" disconnect and a shut-off valve there also.
Note the copper pipe (1/4") bent (and passing through the wood base) is anchored using silicone rubber. Outside the pedestal, the wood is double thickness. The assembly is placed between the pedestal and the bath. The wood base is all the way to the other side of the bath. Note the in-line shut off valve to adjust the rate of the dripper. Below that are the "adapters" to fit it to the
garden hose. I have a "quick" disconnect and a shut-off valve there also.
The wood "wedges" under the bath are for leveling purposes. I use three of them to level the bath so it carries the most water. If left on (day and night,) at the rate of 90 drops per minute, I estimate the water used to be about 9 gallons per 24 hours.
 In making pipe joints, use Teflon tape on the threads. This makes it easier to tighten the parts, and makes them
watertight. It is hard to control the rate of the dripping at first, but in time you'll get the hang of it. I tighten it all the way, then very slowly release it to get the rate I want.
In making pipe joints, use Teflon tape on the threads. This makes it easier to tighten the parts, and makes them
watertight. It is hard to control the rate of the dripping at first, but in time you'll get the hang of it. I tighten it all the way, then very slowly release it to get the rate I want.
The dripper you see is about 3 years old. It works better as it ages (i.e. it "leaks" now, just enough so that when I tighten it all the way, it drips at the perfect rate!) Note that in cold weather, the dripper has to be disconnected and drained when the temperature drops below freezing. If left on, it will freeze and the
freezing water inside it will rupture the various parts.
 In winter, I add water manually, and I have a thermostatically controlled heater to keep the water from
freezing. It works well, but needs daily attention in the winter. Note
the heater (blue) has a black "handle" which is tied to the dripper
and a small rock is tied on top the heater element to keep it immersed in the
water. The electrical connection is also covered with plastic and taped to
keep it dry in rain and snow.
In winter, I add water manually, and I have a thermostatically controlled heater to keep the water from
freezing. It works well, but needs daily attention in the winter. Note
the heater (blue) has a black "handle" which is tied to the dripper
and a small rock is tied on top the heater element to keep it immersed in the
water. The electrical connection is also covered with plastic and taped to
keep it dry in rain and snow.
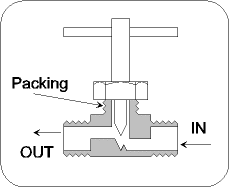 The
tube-to-tube shut off valve is shown on the left. Note the water flow is best -for
dripper application- as shown. If it leaks around the stem, tighten the
nut shown a little. If after years of use it cannot be tightened
adequately, take out the nut and needle valve, replace the packing material
inside around the stem,
(available at hardware stores,) and replace the valve and nut.
The
tube-to-tube shut off valve is shown on the left. Note the water flow is best -for
dripper application- as shown. If it leaks around the stem, tighten the
nut shown a little. If after years of use it cannot be tightened
adequately, take out the nut and needle valve, replace the packing material
inside around the stem,
(available at hardware stores,) and replace the valve and nut.